How To Export And Rig An Old School RuneScape Character Model With Creator's Kit, Blender, And Mixamo
Introduction
In this tutorial, we are going to learn how to export a 3D player character model from Old School RuneScape using the Creator's Kit plugin for RuneLite. We will then clean that exported 3D model up in Blender. Finally, we will use Mixamo to automatically rig that 3D model and (optionally) add an animation to that rig.
Prerequisites
- RuneLite
- Blender (this tutorial uses Blender v4.5.4)
- Mixamo account (free Adobe account)
- Basic familiarity with 3D software and terminology (model, skeleton, rig, animation, etc.)
Exporting a Character Model with Creator's Kit
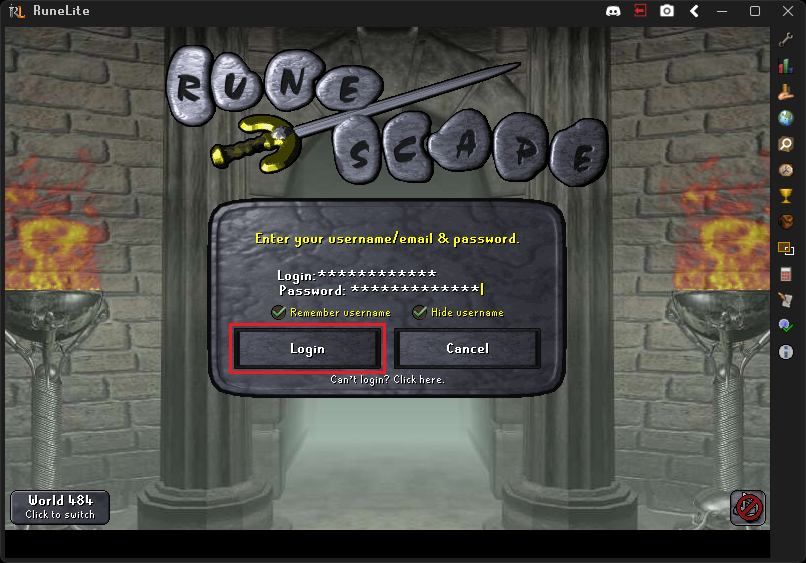
Open RuneLite and log in to your Old School RuneScape account.
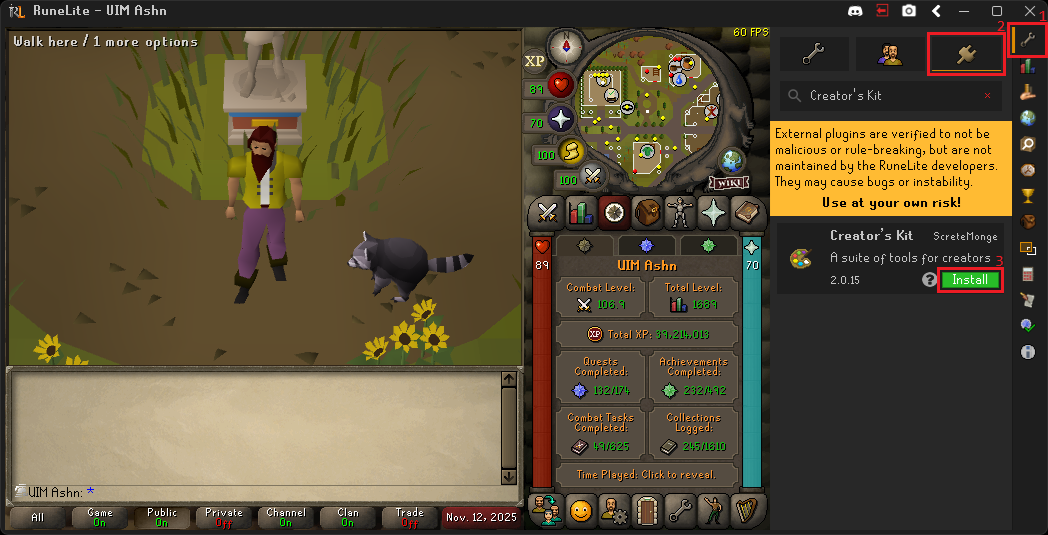
Click the Configuration button on the right hand side of the RuneLite
application, followed by the Plugin Hub button within the configuration
panel. When the plugin hub opens, type "Creator's Kit" into the search box, and
click the Install button on the Creator's Kit plugin from the author
ScreteMonge. This will download and install the Creator's Kit plugin into your
RuneLite client.
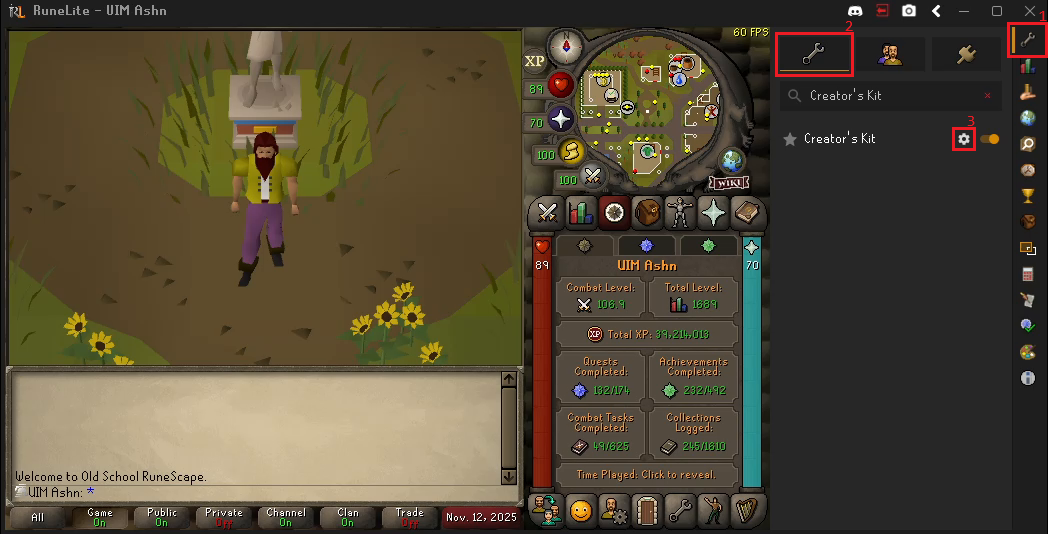
Now that the Creator's Kit plugin is installed, click the larger
Configuration button on the same line as the Plugin Hub button. When the
plugin configuration list opens, type "Creator's Kit" into the search box, and
click the Edit plugin configuration button on the Creator's Kit plugin.
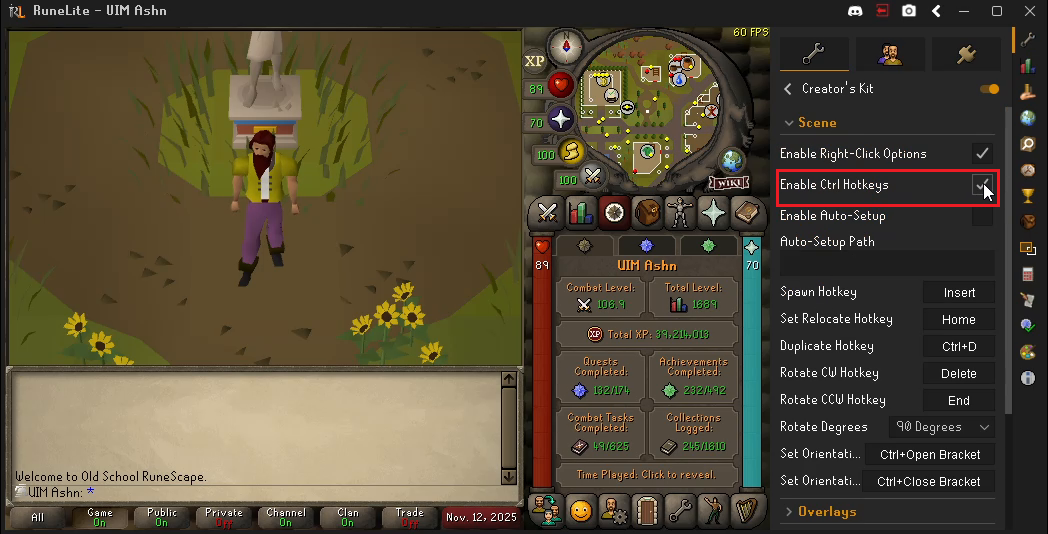
Once the plugin configuration panel has opened, navigate to the Scene section
and check Enable Ctrl Hotkeys. This will let us place a copy of our player
model with CTRL + Left Click in the next section.
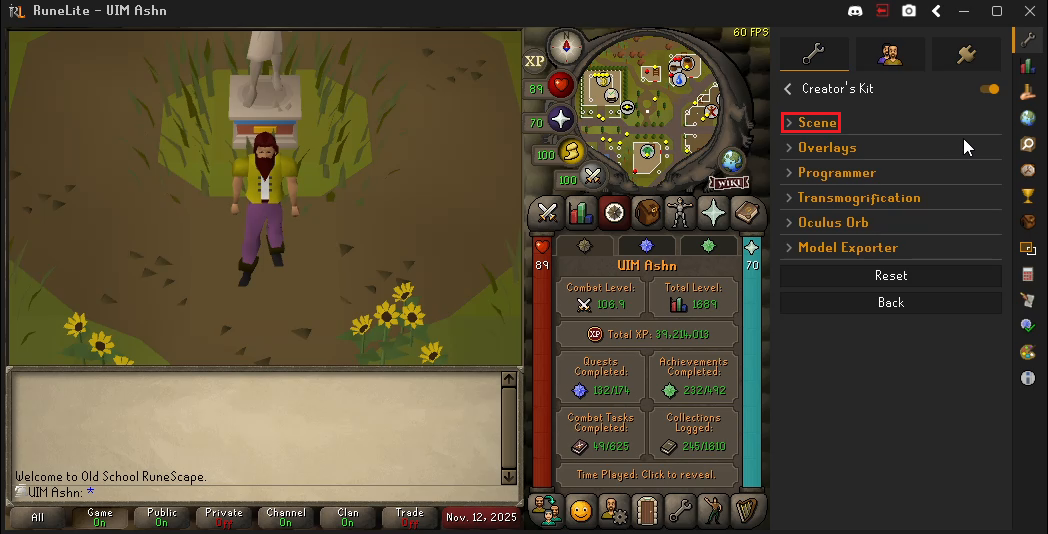
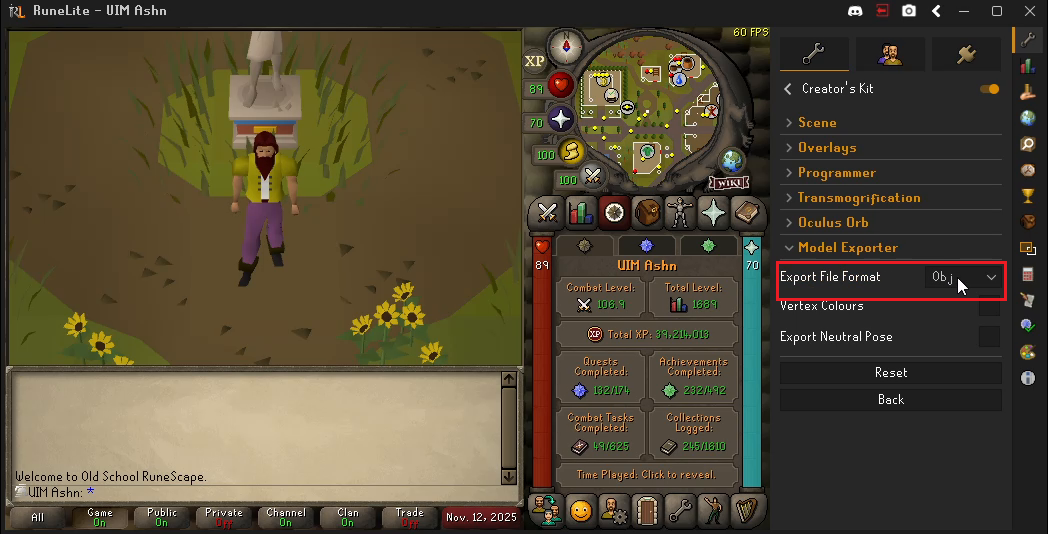
Close the Scene section and navigate to the Model Exporter section, and set
the Export File Format to Obj. This will ensure that Creator's Kit exports
our 3D model as a .obj file that Blender can understand without any external
plugins.

Next, click the Creator's Kit button on the right hand side of the RuneLite
application, and then click the big Add Object button that should appear at
the top of the new panel.

A new object entry will appear just below the Add Object button. Feel free to
rename this object to whatever you would like; the object name will become the
file name of the exported model. For this example I renamed the new object to
"Player". By default, the Frame and Anim ID (animation ID) fields will be
set to -1. We specifically want to keep both of these fields with their
default value, as a frame and animation ID of -1 will tell Creator's Kit to
export our model in a default pose that will make auto-rigging with Mixamo
easier later on.

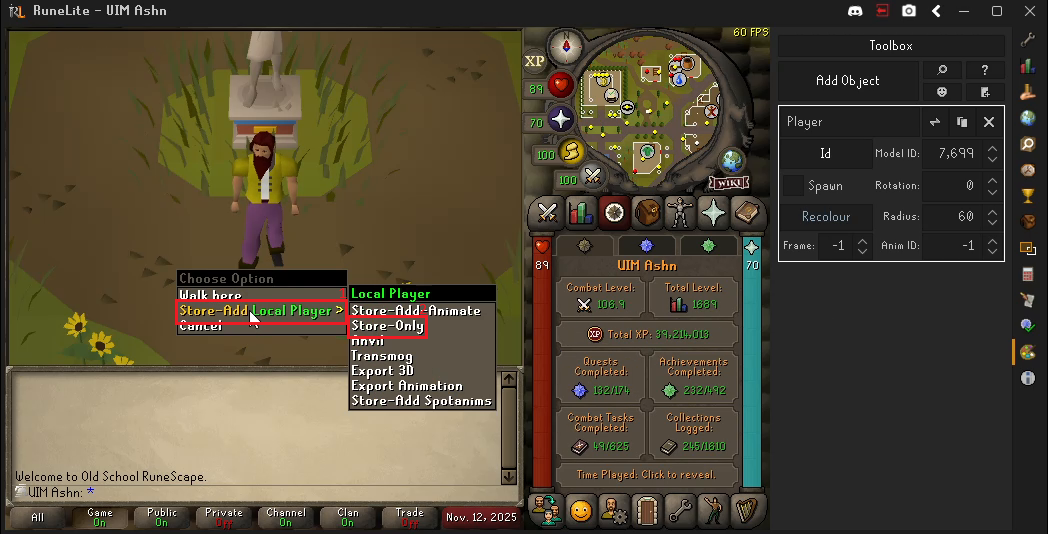
Now we are going to attach the player character model to this newly created
object. Right click on your player character and select Store-Add Local Player followed by Store-Only. This will tell Creator's Kit to group all of
the individual components that make up the player character model into a single
entity that can be manipulated and exported by the plugin.
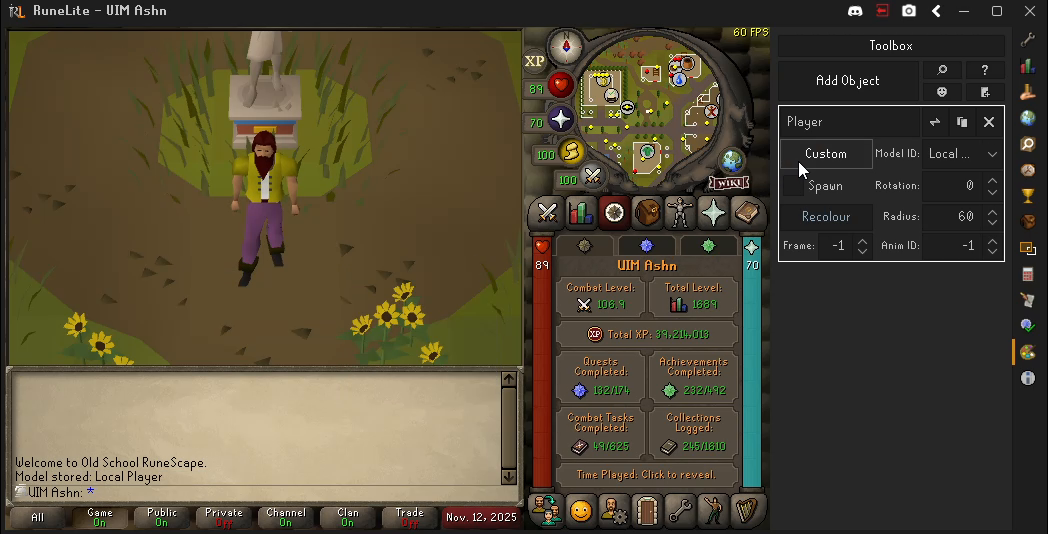
Once your player character model is stored, go back to the object entry that
you just created, and click on the button that says Id, which will switch it
from Id to Custom. The Model ID field should automatically populate with
the Local Player model we just stored.

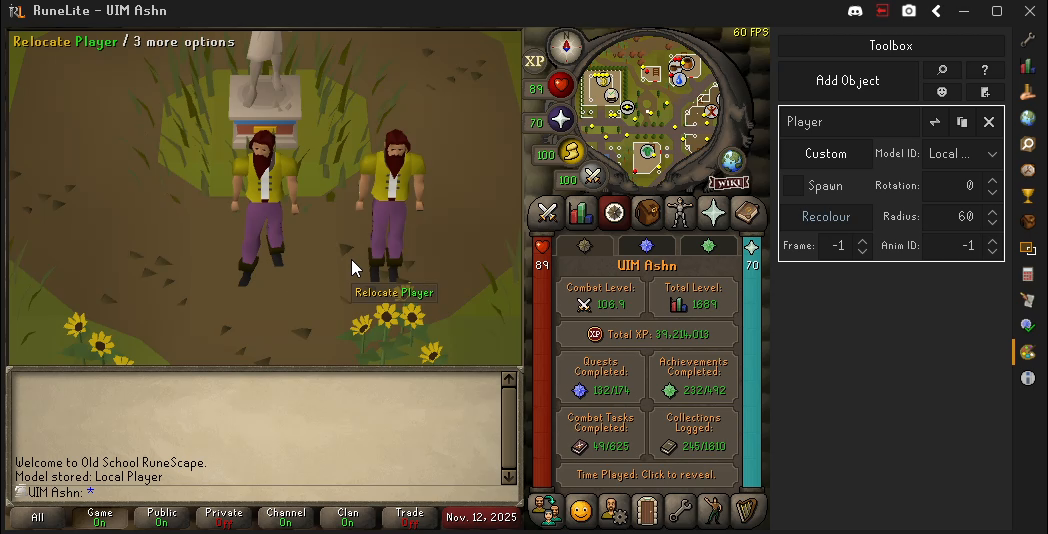
Click anywhere back in the main play area to re-focus the cursor on that area.
Then, move your cursor to some piece of ground nearby and then hit Ctrl + Left Click to place a copy of your player character model onto the ground in a
default pose.
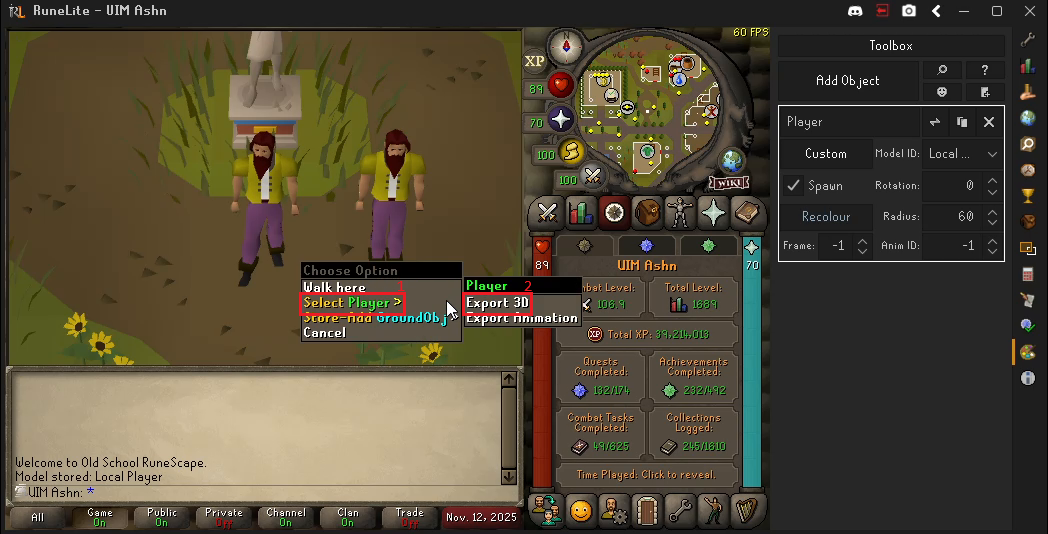
Finally, right click on the newly placed player character model, and select
Select {YOUR-OBJECT-NAME} followed by Export 3D. Since I named my object
"Player", this showed up as Select Player in this example.
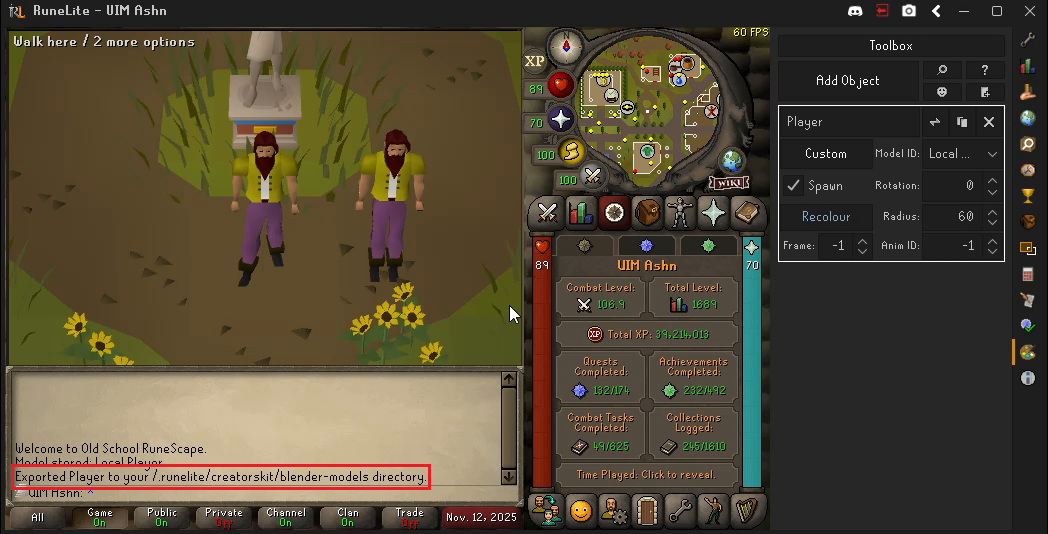
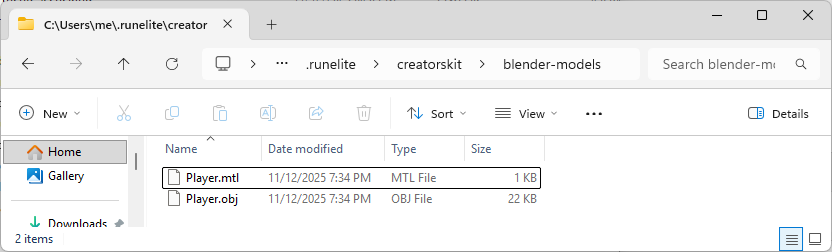
After clicking Export 3D, you should see a message in your chat window
indicating that model has been saved somewhere within your .runelite
directory. You can find this directory by right clicking the camera icon in
RuneLite, selecting Open screenshot folder..., navigating up one directory to
.runelite, and then navigating into the creatorskit and blender-models
directories under that .runlite directory. On Windows this blender-models
folder should be located at
C:\Users\{YOUR-USERNAME}\.runelite\creatorskit\blender-models.
All together the Creator's Kit export process looks as follows.
Cleaning Up the Character Model in Blender
The character models exported from Creator's Kit need a bit of cleanup before they can be rigged using Mixamo. Specifically, we need to delete some miscellaneous geometry attached to our character model, and then re-export that model in the FBX format that Mixamo uses.
Open Blender and start a new project. Delete the default Camera, Cube, and
Light objects in the scene by selecting all three objects with Shift + Left Click, right clicking, and then selecting Delete from the popup menu.
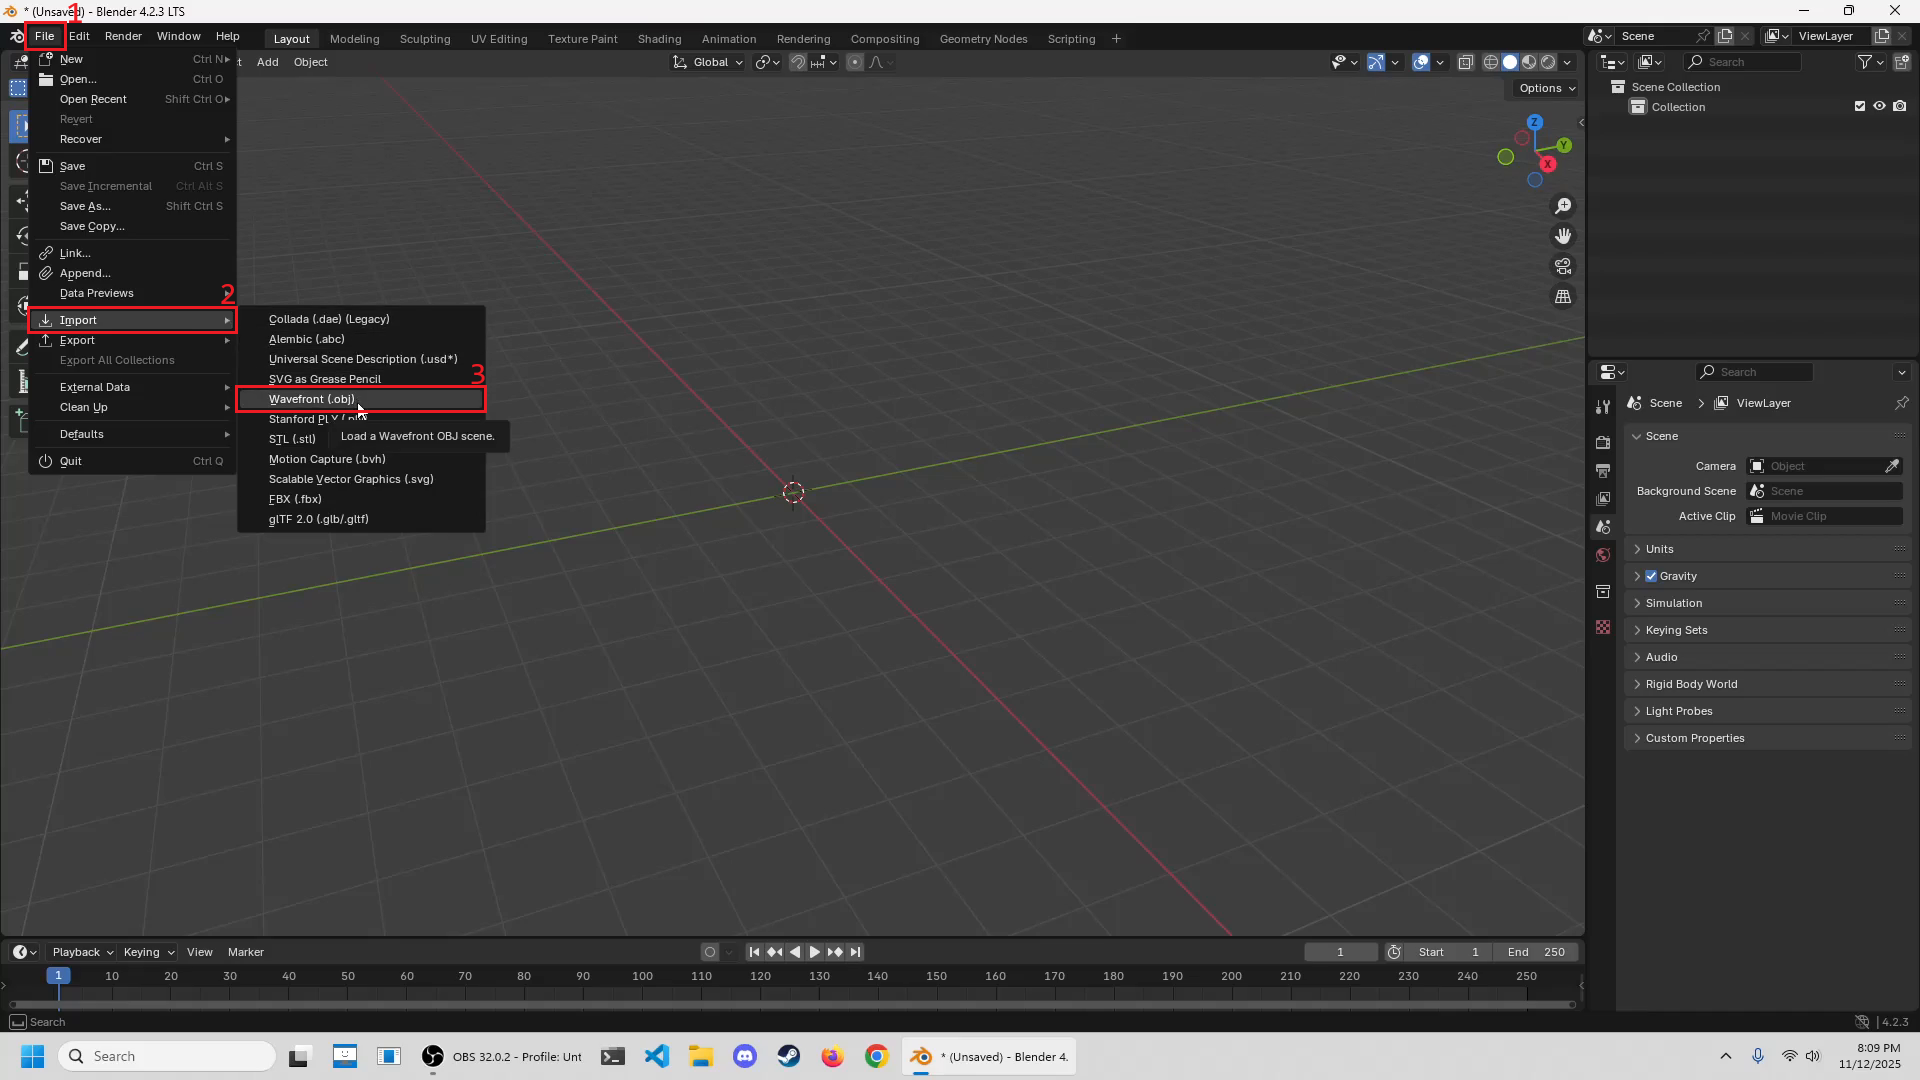
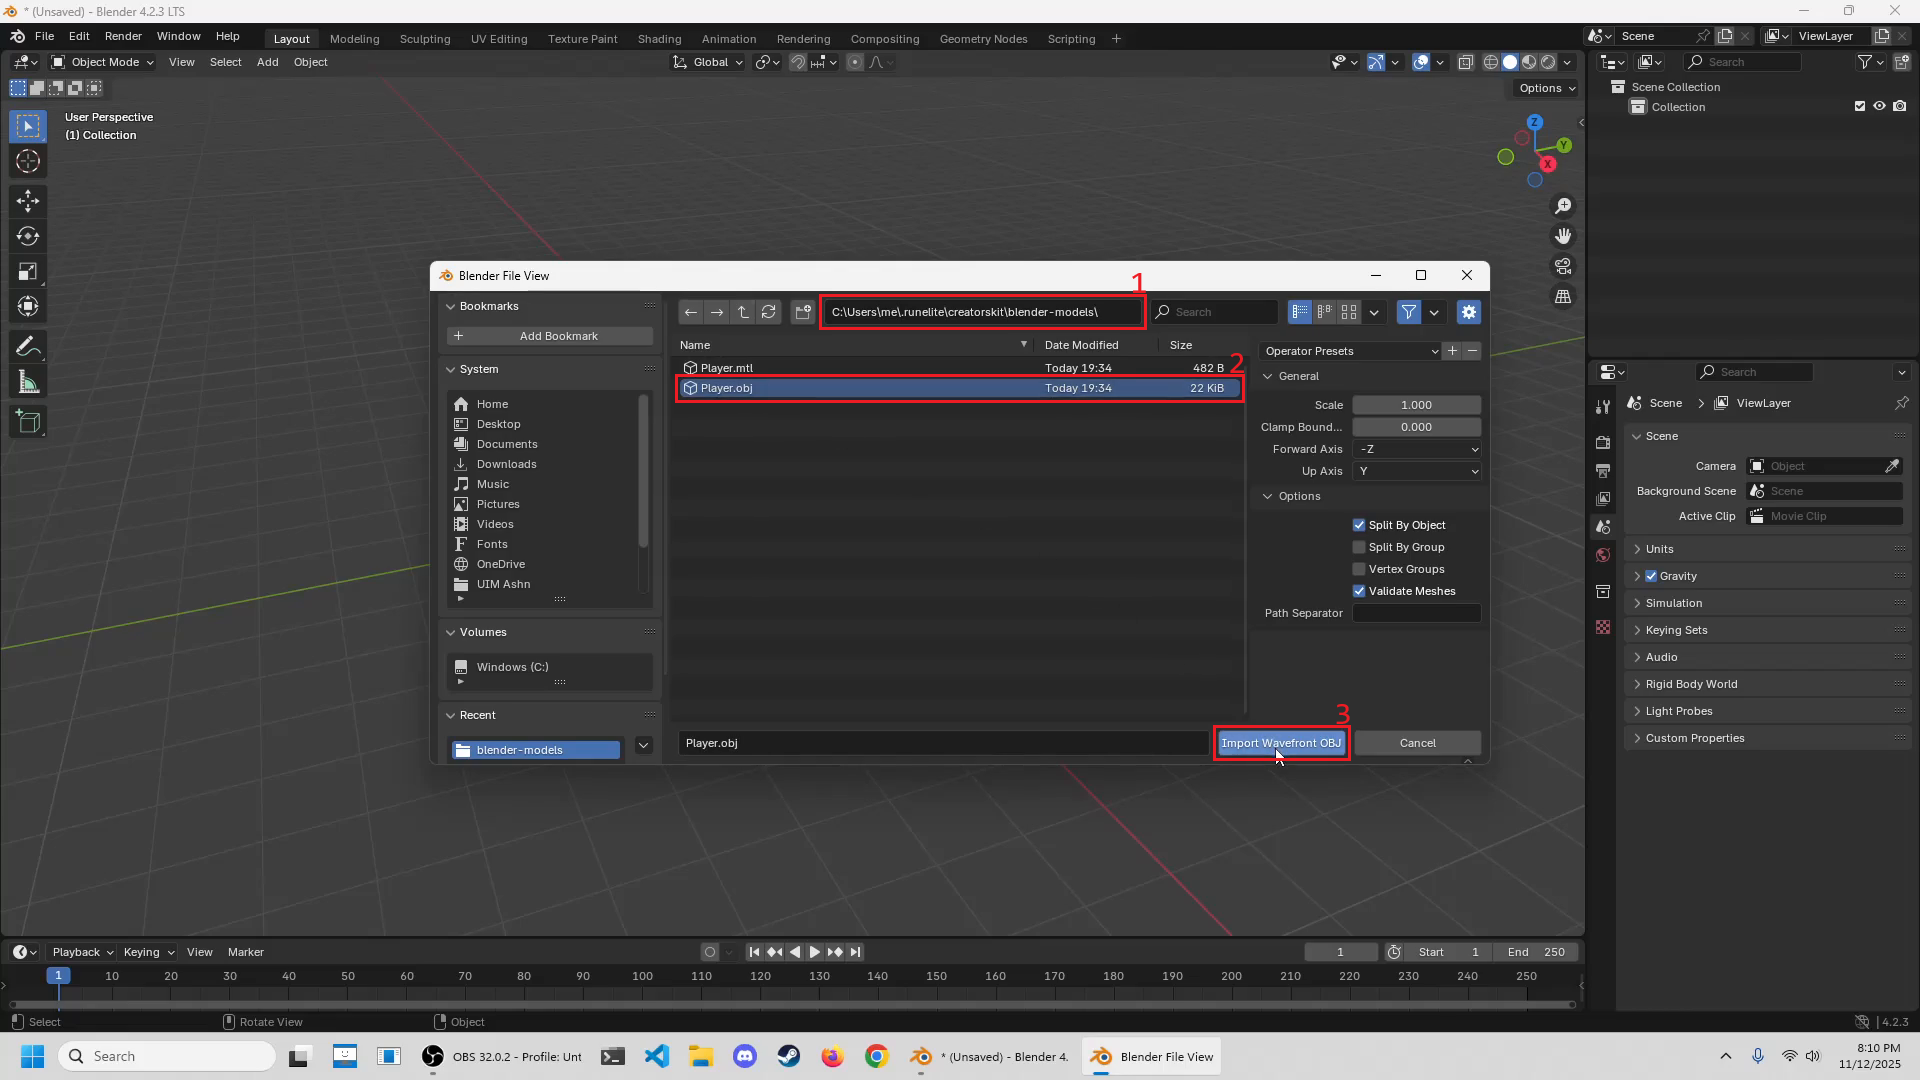
Click on File -> Import -> Wavefront (.obj) to open an import dialog
window. From here, enter the location of the
.runelite\creatorskit\blender-models folder from earlier, select the .obj
file that was exported by Creator's Kit, and then import that file by clicking
on the Import Wavefront OBJ button at the bottom of the window.
You should now see your player character appear in the scene. Zoom in on your player model with the scroll wheel. Although a bit hard to spot (you may need to move the camera around by holding the middle mouse button and moving your mouse), there is a single triangle between the feet of your model. This is the piece of miscellaneous geometry we need to delete in order for Mixamo to not get confused when we hand it our model.
Click the middle mouse button and move your mouse around so that you are
looking up at your model from below. Alternatively, left click the group of
red, green, and blue circles labeled X, Y, and Z in the upper right
portion of the screen and move your mouse around to look up at your model that
way.
In the upper left hand side of the screen, there is a button that says Object Mode. Click on this button, and then click on the Edit Mode button that
appears from the dropdown menu. Edit mode allows you to edit the geometry of
your 3D model. In our case we want to edit the geometry of this 3D model by
deleting the triangle below the player character's feet. To do this, hold
Shift and left click the three vertices that make up the triangle. Once
selected, hit the Delete key on your keyboard, and select Faces from the
popup menu. This will remove these vertices and the piece of geometry that was
formed by them.
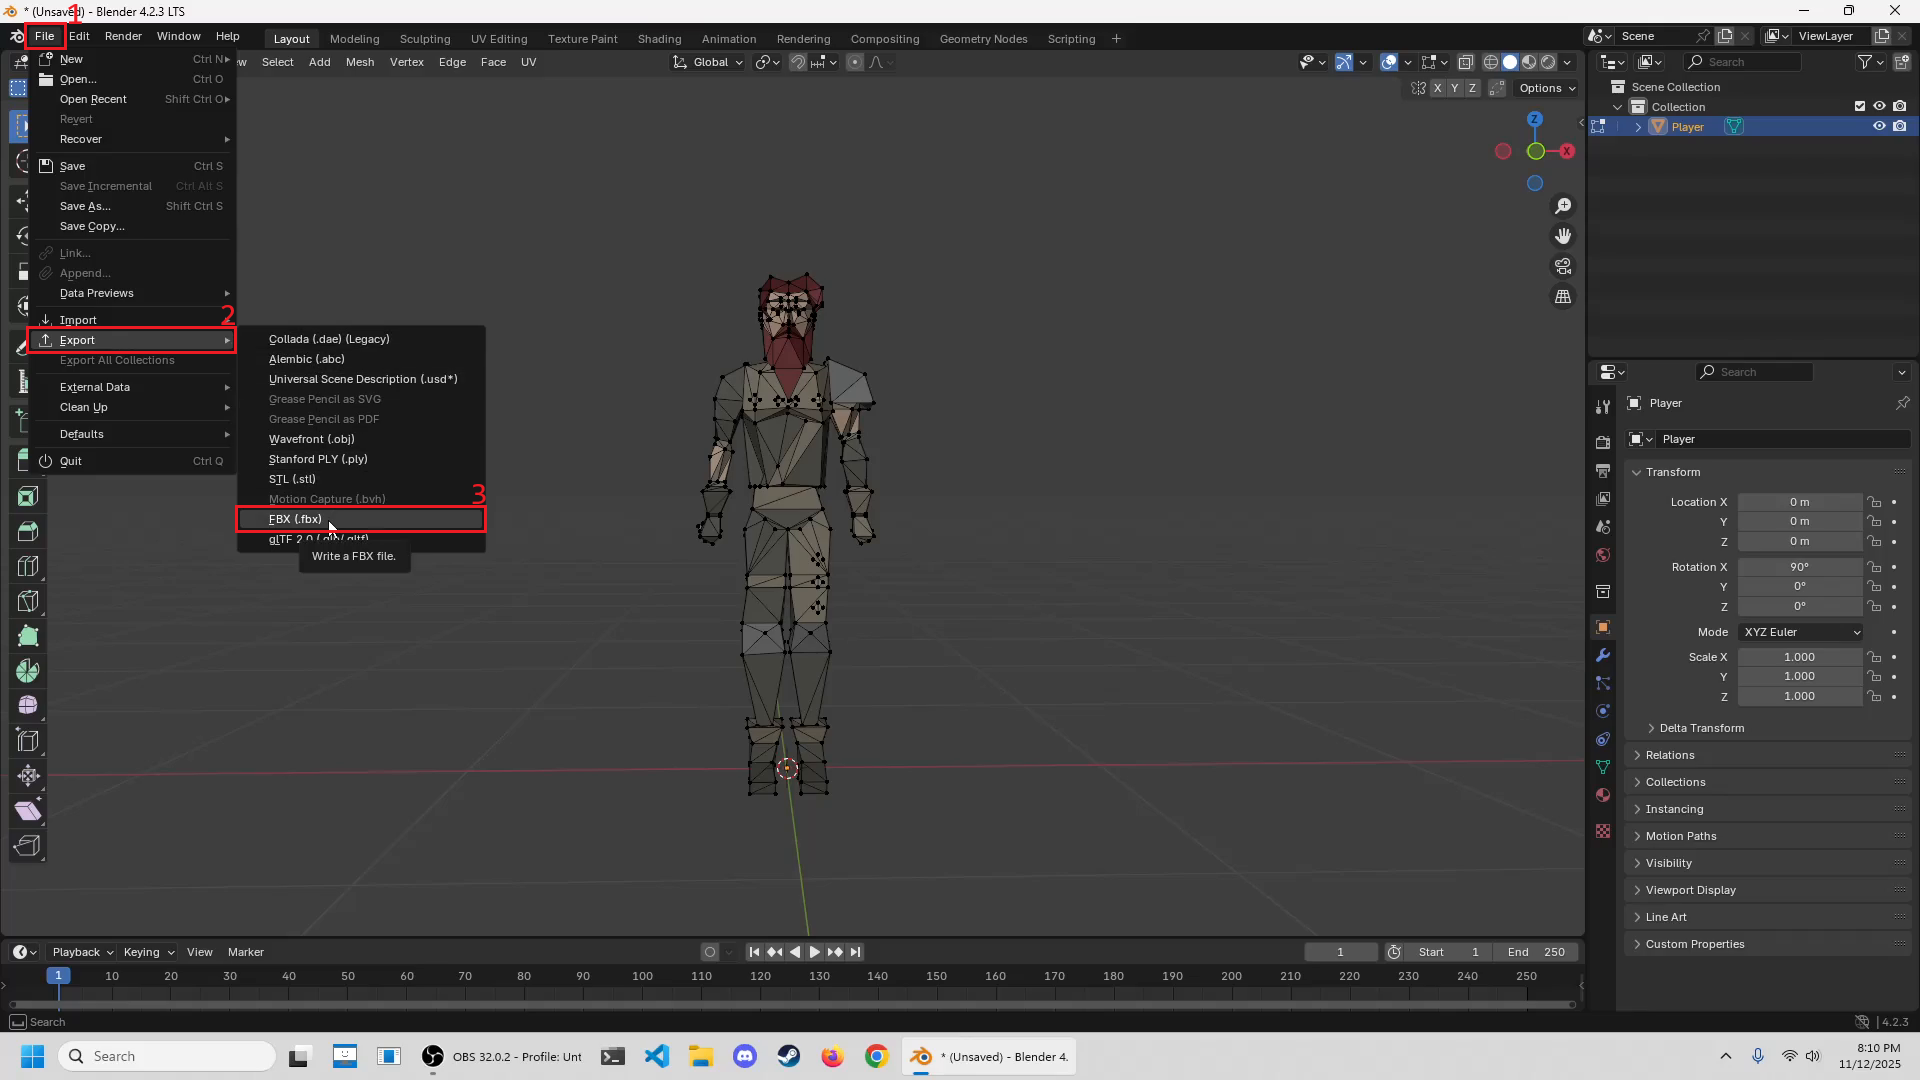
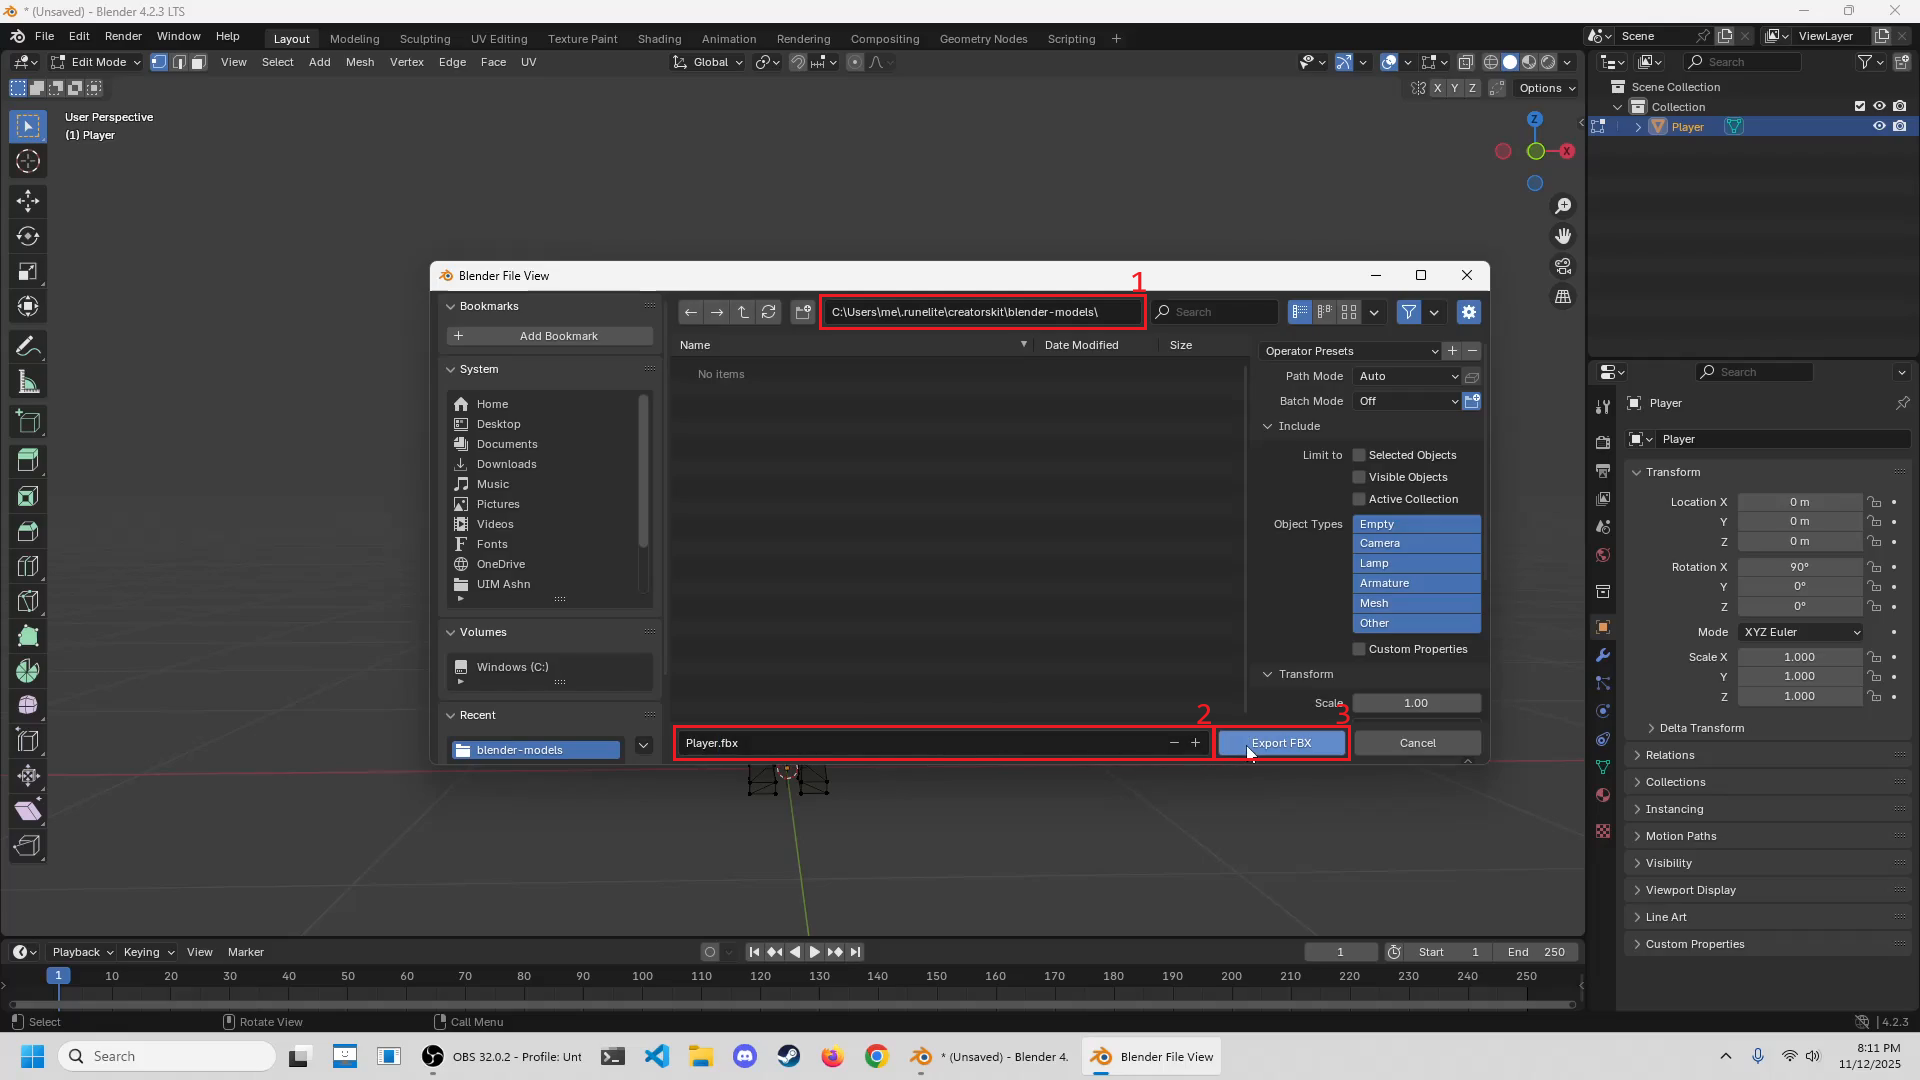
Now our model is all cleaned up and ready to be imported into Mixamo. Last
thing we need to do in Blender is export our model as an FBX file. Click on
File -> Export -> FBX (.fbx) to open an export dialog window. From here,
once again enter the location of the .runelite\creatorskit\blender-models
folder from earlier, give the .fbx file a name (I named mine "Player.fbx"),
and then export that file by clicking on the Export FBX button at the bottom
of the window.
All together the Blender cleanup process looks as follows.
Rigging the Model in Mixamo
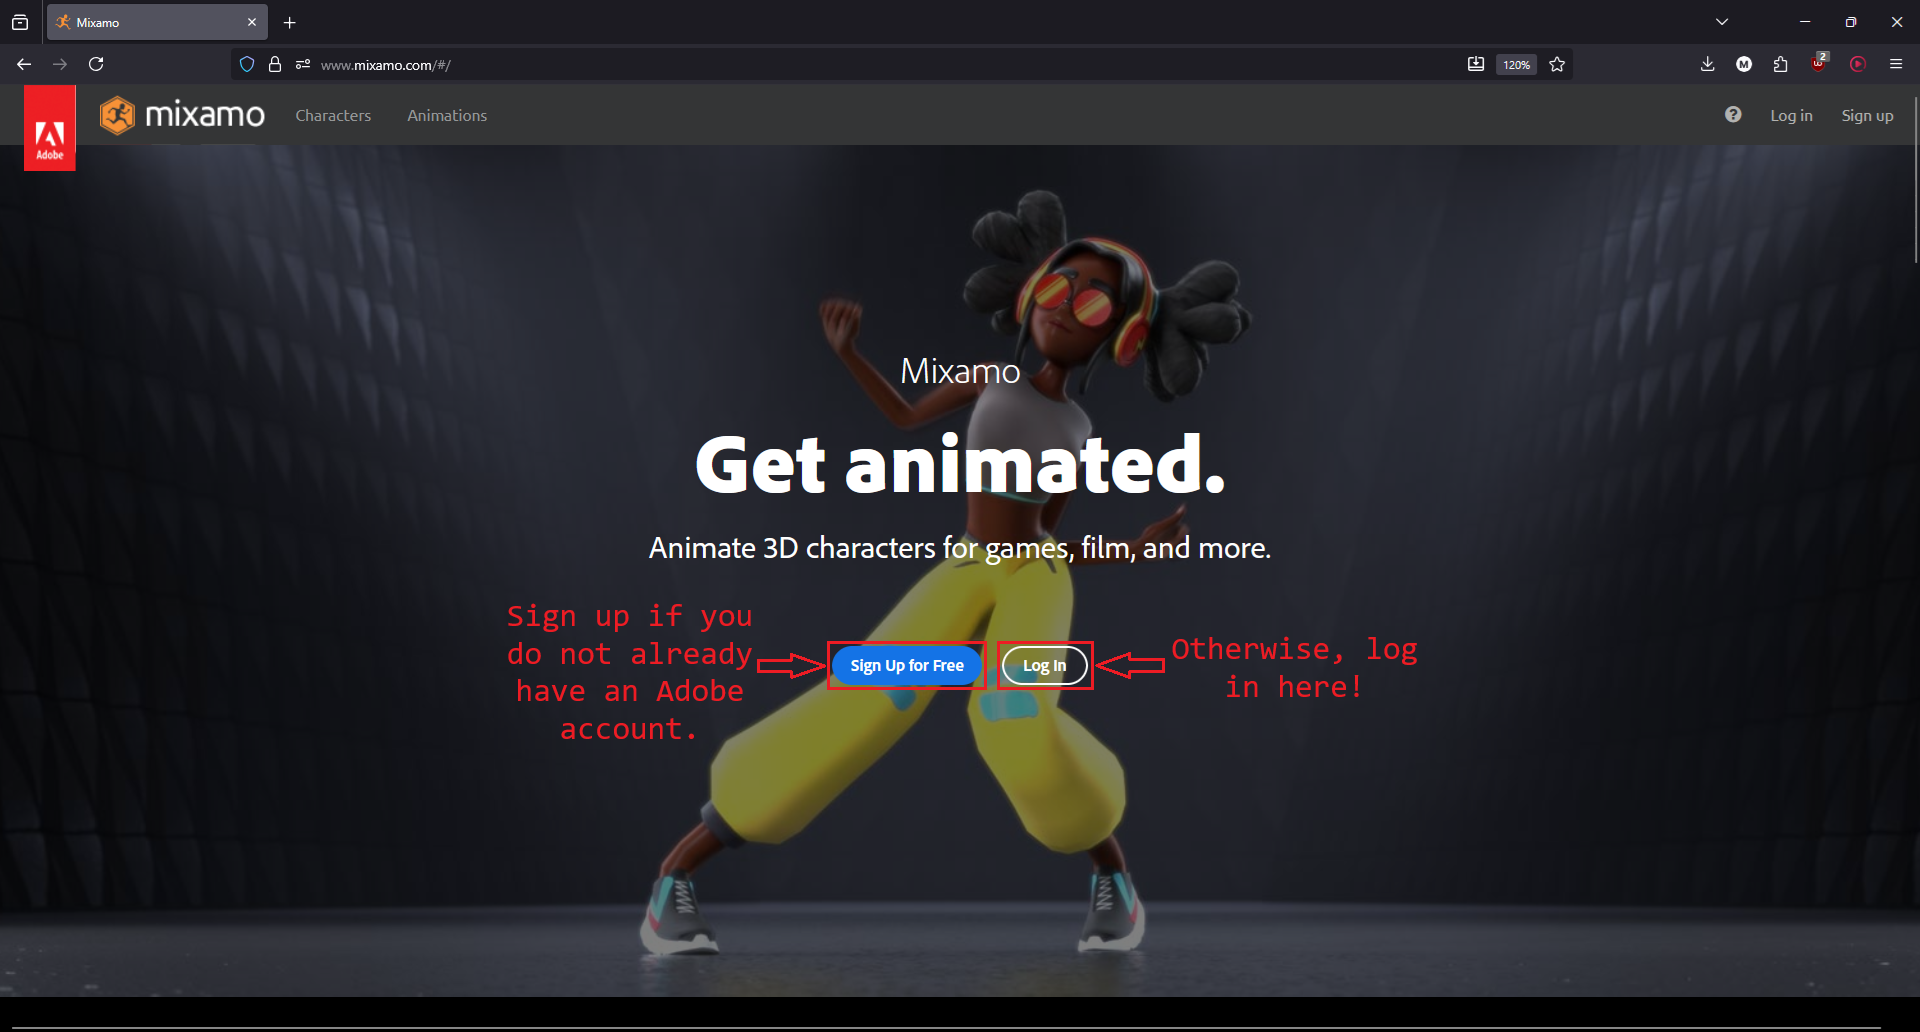
Open a web browser and navigate to www.mixamo.com. If you do not have an Adobe account, then you will need to sign up to continue. Otherwise, log in to Mixamo with your existing account.
Once logged in, you will be greeted with a screen showing the last model you
rigged (if any), a panel full of animations, and some model management buttons
on the right hand side of that screen. Click the UPLOAD CHARACTER button, and
select the FBX file that you just exported from Blender.

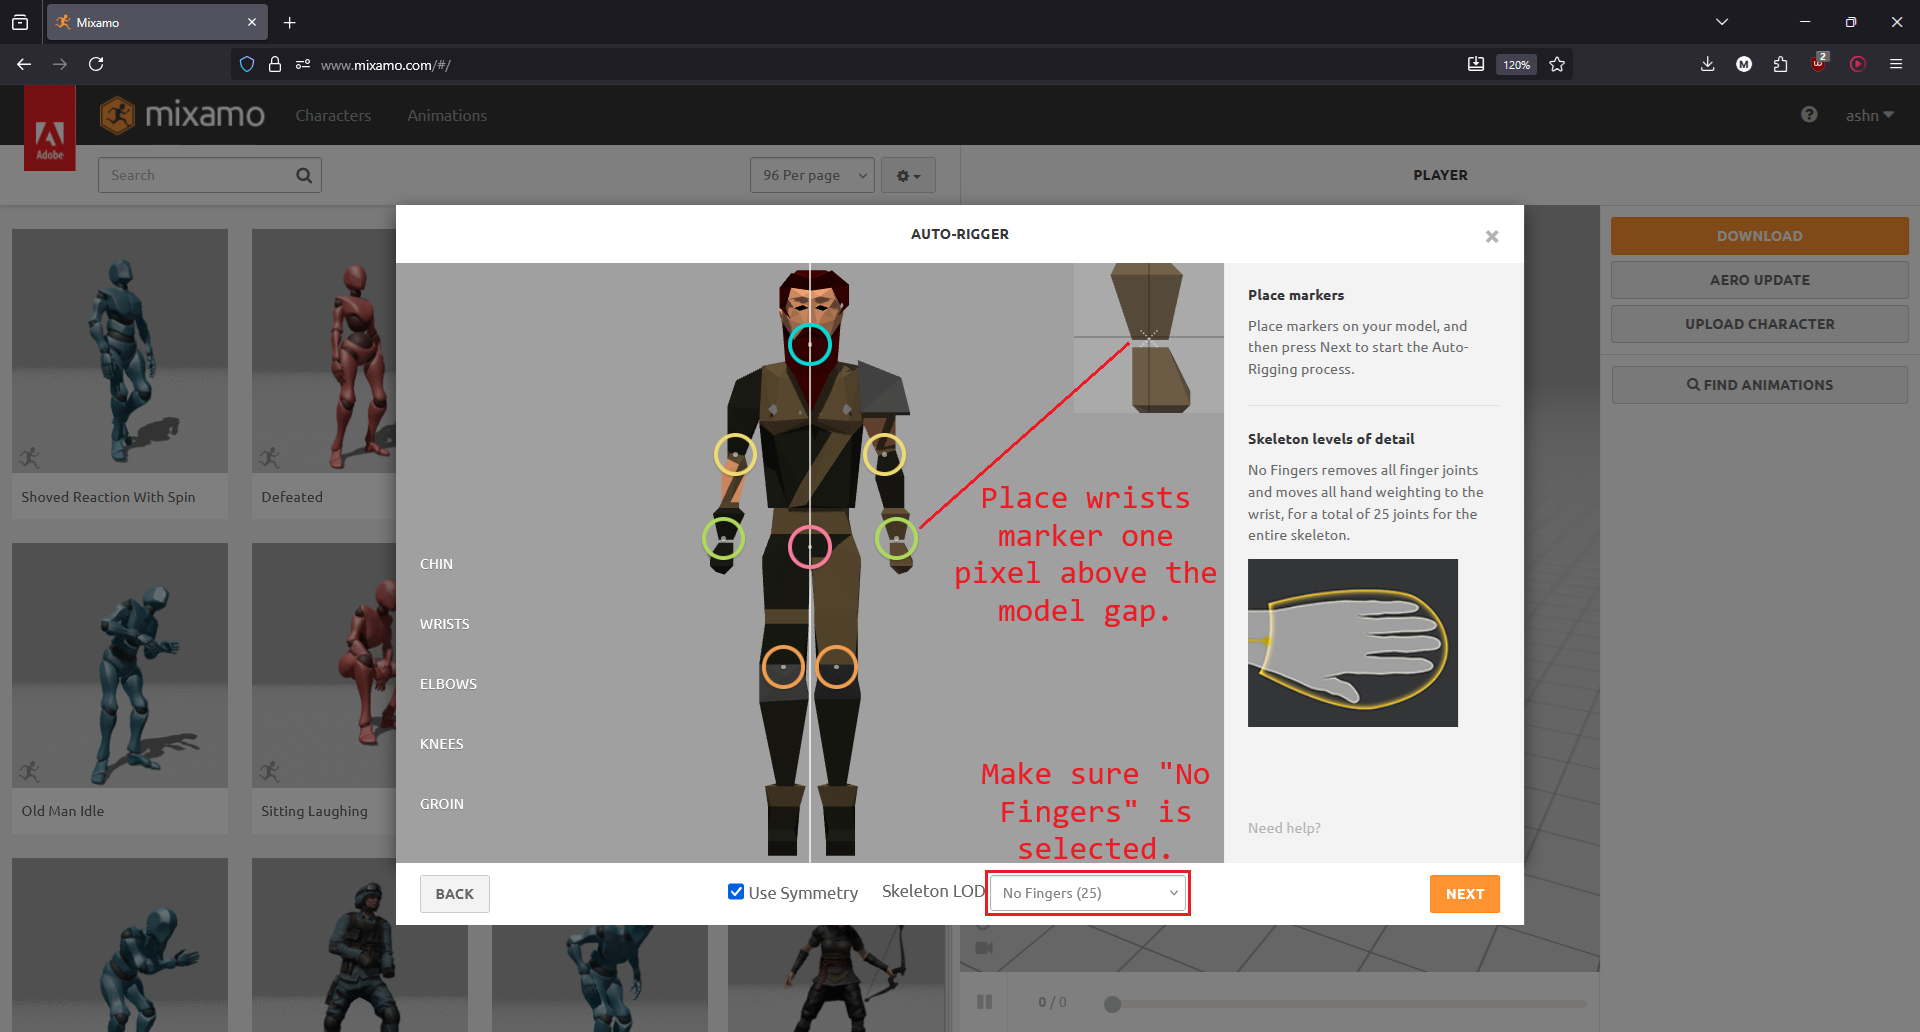
This will take you to the auto-rigger, the Mixamo special sauce that will automatically rig a model based on a few markers we place around the model.

Place the markers on the associated body parts of your player character model. These do not need to be 100% accurate, so don't worry if things are a few pixels off in the auto-rigger.
Note that many Old School RuneScape character models will have gaps between the forearm and hand parts of the model. Even though this gap is where the wrist theoretically should be, Mixamo will fail to rig the model if the wrist marker is placed on this gap. I have had relatively good results placing the wrist markers one or two pixels above this gap.
Also note that Old School RuneScape characters do not have fingers, and if you
generate a rig that includes finger bones, then the animations applied to the
rigged model will make the hands exhibit all sorts of weird looking behavior.
Click the Skeleton LOD dropdown and select No Fingers (25) to generate a
rig without finger bones.
Click Next and wait for the auto-rigger to generate your rig. Once the
generation finishes, inspect your model to make sure nothing is obviously
wrong, and then click Next to confirm the character rigging. On the left
panel you can choose any one of the dozens of sample animations to see how they
look on your rigged character.
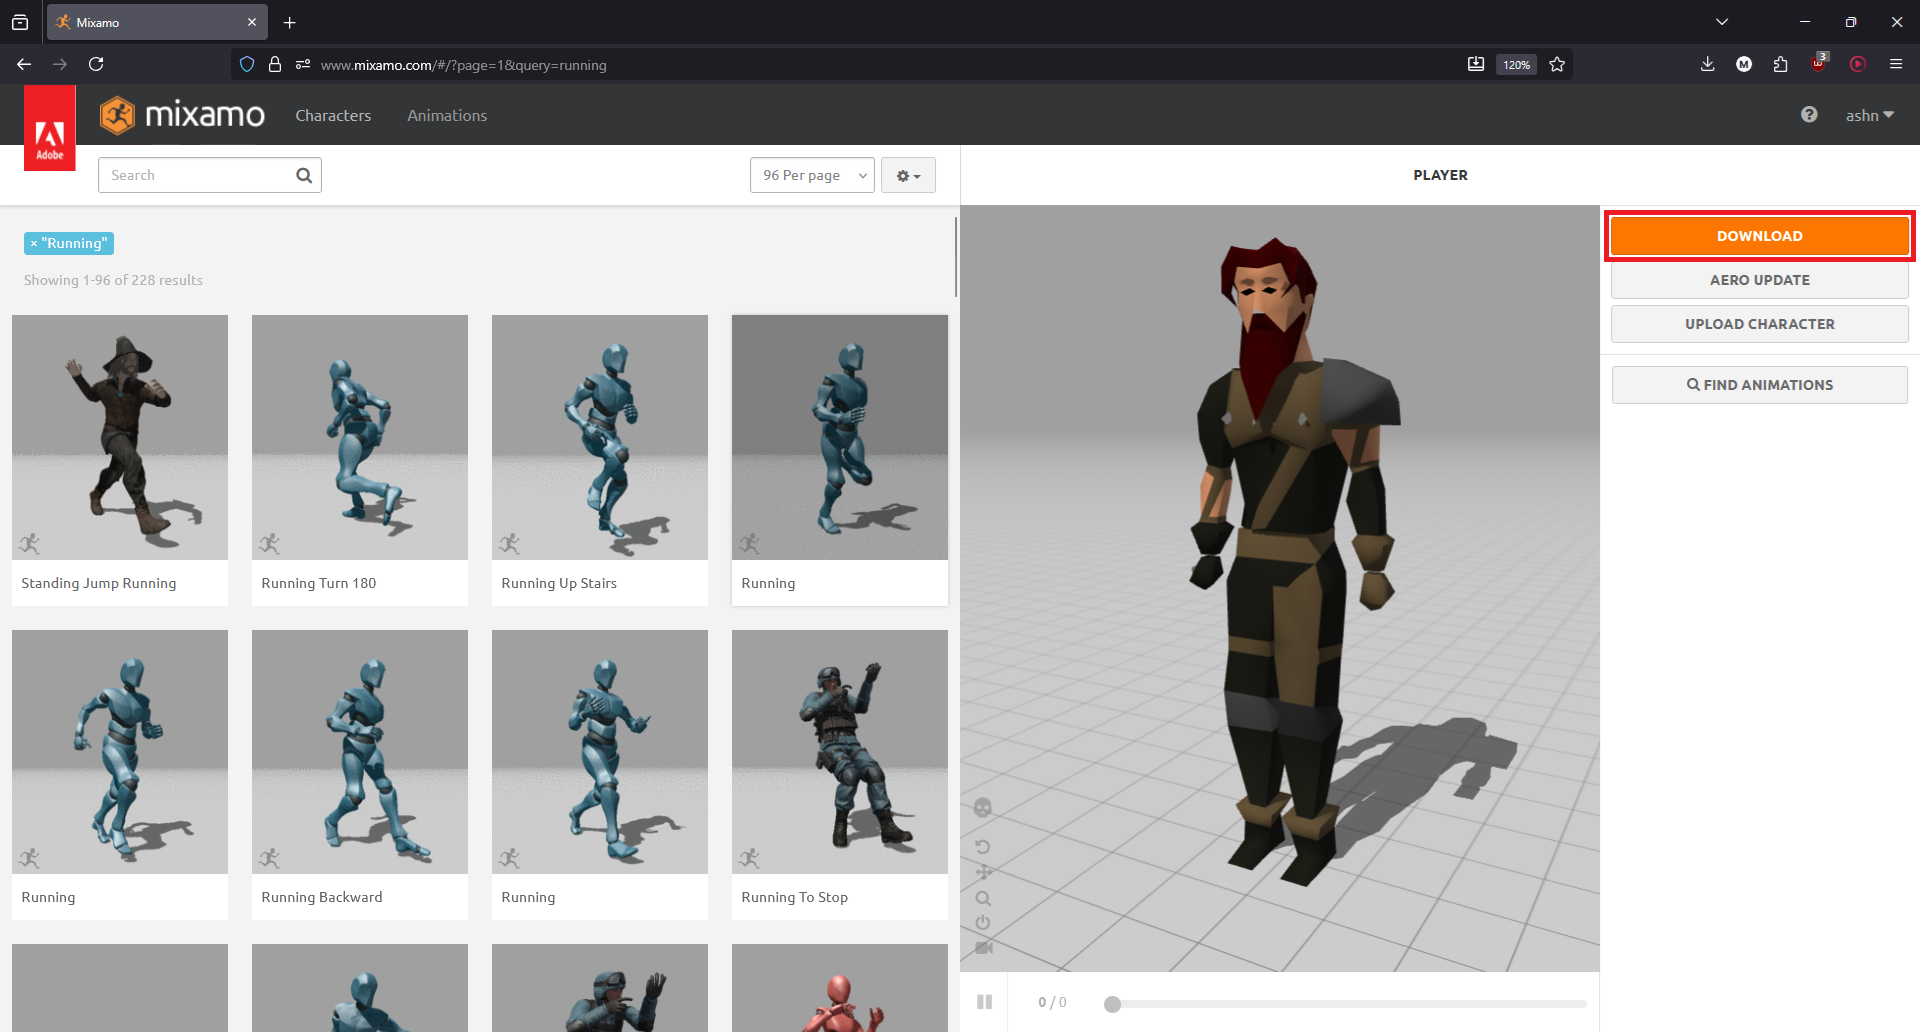
To export the rigged model, simply click the DOWNLOAD button on the right
hand side of the page.
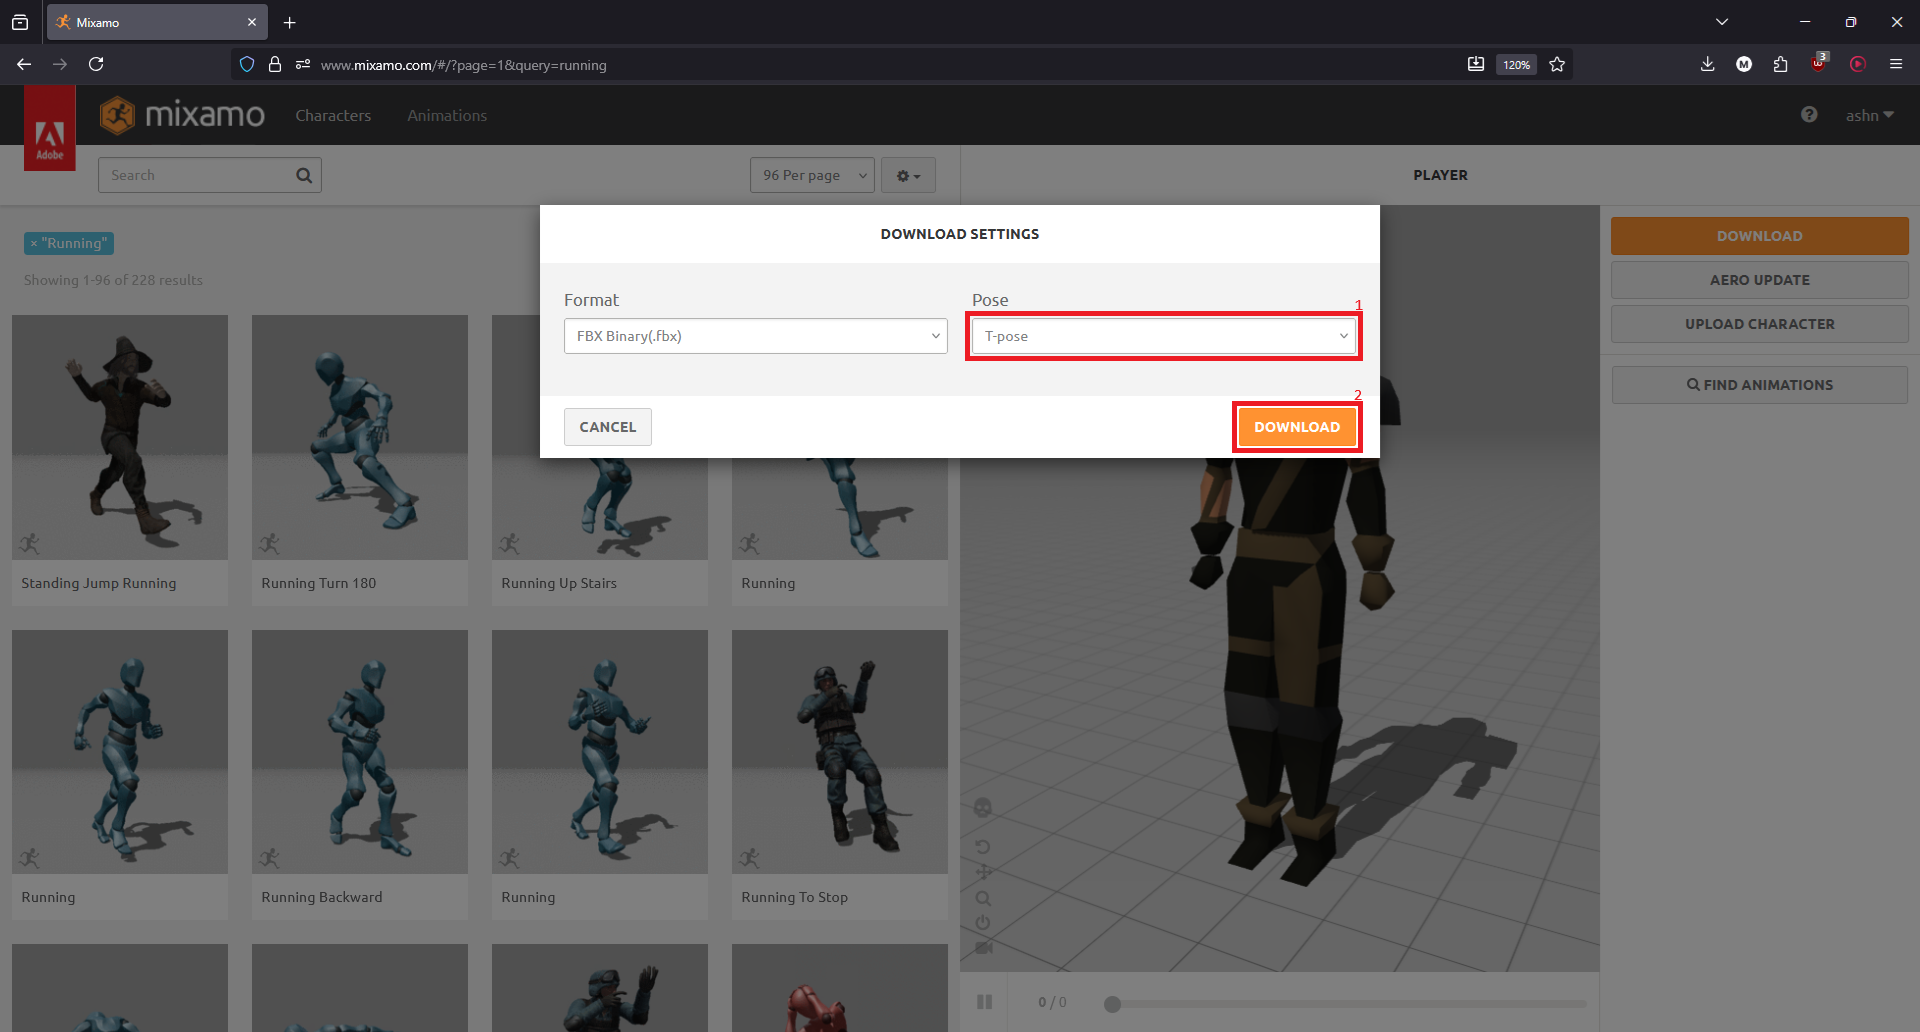
If no animation was selected, then the download will contain only the rigged
model. This is what you want to do if you plan on animating your model in
Blender or another 3D application later. Make sure that the Pose option is
set to T-pose and click Download. Alternatively, you can set the Pose
option to Original Pose(.fbx) if you would prefer to use the pose that was
used for the original export from Creator's Kit with the player character's
arms at their side.
If an animation was selected, then the download will contain the rigged model
with that animation attached. The default options here are usually good enough,
so just click Download.

Wrapping Up
After downloading the completed model from Mixamo, you now have a fully rigged model suitable for importing back into Blender or other 3D creation tools. Double check that your model cleanly imports back into Blender and then celebrate! 🥳 🎉
Sources and Thanks
This tutorial would not have been possible without the following resources:
- ScreteMonge and their legendary Creator's Kit plugin as well as their excellent Creator's Kit 2.0 tutorial series on YouTube.
- TheSculled and their amazing Blender Tutorials series on YouTube.
Thank you to these creators! <3